Saturday, April 27, 2013

And the 2de Tau XV8 Crisis Battlesuit...

I just finished the 2de Tau XV8 Crisis Battlesuit in the same colors as the first one. I also chose to let this one fly. These 2 Battlesuits have been painted with a little help of my airbrush. I used it for the green , then wased it & finaly highlighted it. It saved me a lot of paintwork.
Here are some pictures : 


Now i'm going to paint miniatures from an other army. But what? I'll have to think about that one...

Painted : 33 / 100

Tuesday, April 23, 2013

Tau XV8 Crisis Battlesuit

Today i finished the first Tau XV8 Crisis battlesuit. 
Here are some pictures :


Painted : 32 / 100

Sunday, April 21, 2013

Tau XV8 Crisis Battlesuits WIP

Yesterday i started modeling 2 Tau XV8 Crisis Battlesuits. The 3th has to wait a bit because i still do not know what weapons he will get. Here are some pictures of my workbench.


Thursday, April 18, 2013

Tau drones 3 ... new color ...

Today i finished another 2 Tau drones. This time i chose a new color scheme. A color scheme that suits with the one i already had. My first color scheme is grey washed with purple highlighted with blue and yellow washed with sepia highlighted with yellow. The second color scheme is grey washed with purple highlighted with pink and blue-green washed with camogreen highlighted with blue-green. 
Here are some pictures : 


Next i'm going to paint a Tau XV8 Crisis Battlesuit with the blue-green color scheme.

Painted : 31 / 100

Tuesday, April 16, 2013

Tau drones 2...

Today i finished the 2 Tau drones i spoke off yesterday. Here are some pictures of the 2 drones & some pictures of the group of 4 Tau drones. 


 Painted : 29 / 100

Monday, April 15, 2013

Tau drones...

I'm working on some Tau drones. I finished 2 & i'm still working on 2 more.. 
Here are some pictures of the 2 that are finished : 


I chose these for boosting my paint count. But they do not go as fast as i hoped. 

Painted : 27 / 100

Tuesday, April 9, 2013

Photo background Tutorial

On request of my Blog-readers here is a tutorial of the photo background. 

Needed materials : cardboard , double-sided tape , fabric ( of your choice ) , fabric scissors , staples + stapler , cutting mat , hobby-knife , protractor , ruler & a pencil. 


Step 1 : Draw a rectangle with dimensions of your choice on the cardboard.


Step 2 : Cut the cardboard. Don't forget to cut the folding line & don't forget : do not cut all the way through !


Step 3 : Cut the fabric a bit larger than the cardboard. 


Step 4 : Put double-sided tape on the edges of the cardboard.


Step 5 : Remove the paper of the tape on 1 side & fold the fabric and stick it on the double-sided tape as evenly as possible.  


Step 6 : Repeat this on the other side & don't forget to stretch the fabric a bit so you get a smooth surface.


Step 7 : Staple the sides that are folded. I used colored staples for a nicer result. Watch out that you do not staple on the folding line. 


Step 8 : Repeat steps 5 , 6 & 7 on the other sides.


Finished ... & this is the result. Use something to put behind the background ( a kitchen roll ) and you have a display to take pictures.  


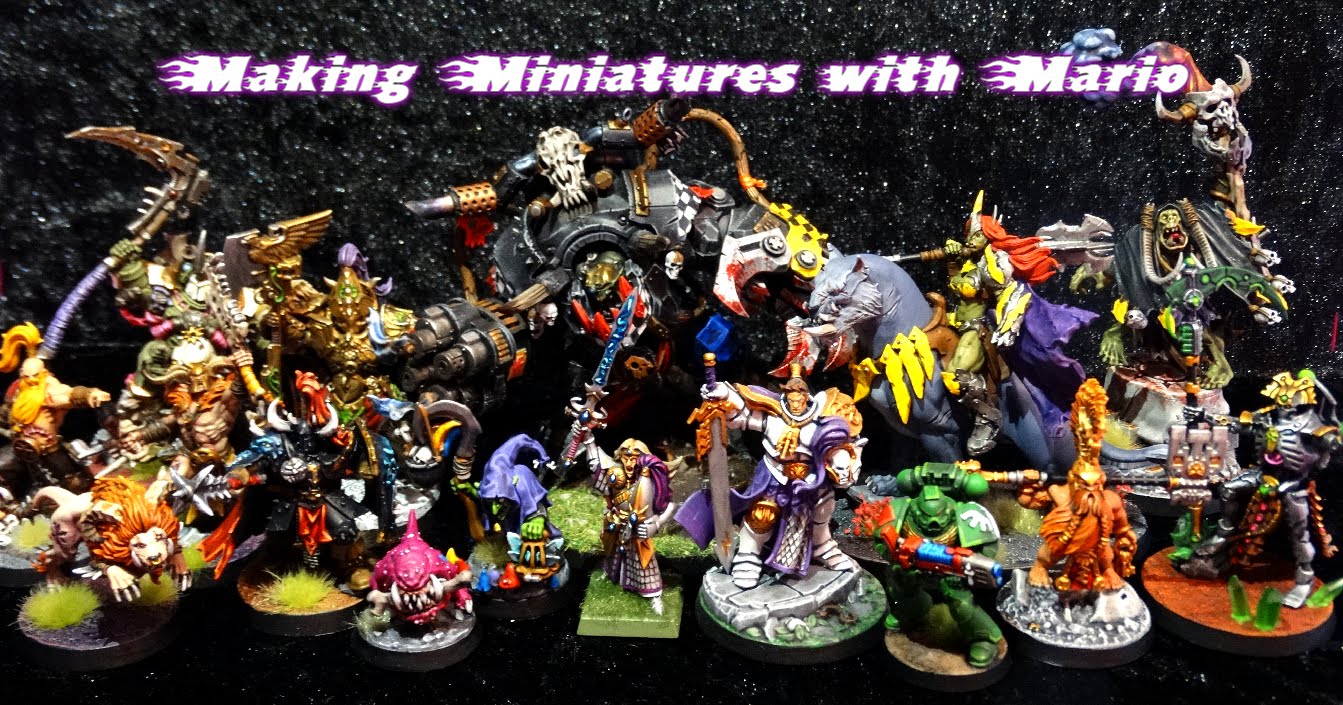
And these are the ones my wife & I finished ... 

Saturday, April 6, 2013

More backgrounds...

Today i made 2 more backgrounds for taking pictures. Here are some pictures of the 2 new backgrounds and the old one for the group picture : 


Tuesday, April 2, 2013

Airbrush Beginnings...

I recently bought an airbrush + compressor. And i'm trying out some things before using it on my miniatures. Here is a little project dedicated to my wife... 


I have to get some more supplies and try some things out before i'm going to use it on my mini's
To be continued ...